Many maintenance managers do not have a proper procedure for storing and handling power transmission belts, yet it makes up one of the top five reasons for early belt failure. Here’s four critical details you need to keep in mind:
1. Location is everything: proper belt storage starts with the environment. Belts should be stored in a cool dry environment under 85oF (29o C) and below 70% relative humidity, with no direct contact with sunlight, UV light and Ozone. Ultraviolet light from sunlight and fluorescent lighting can cause UV degradation, which has a serious detrimental effect on rubber. It accelerates deterioration by producing photochemical reactions that promote the oxidation of the rubber surface, which results in a loss of mechanical strength.
2. Note the shelf life: Dayco belts have a shelf life of 7 years so keeping an adequate FIFO system (First In First Out) is critical. However, we often see a LIFO system instead (Last In First Out) as belts are hung as they come and then taken as needed, always leaving a group of belts that don’t move at all. In most industrial parts warehouses, it is not uncommon to see about 25% of belts past their shelf life, making them unusable and unreturnable.
3. Read the date codes: to make sure your facility’s belts haven’t surpassed their “shelf life”, it is important to learn to read the manufacturing date of the belt on the code printed on the belt:
- WW: Week numbers from 1 – 52 in a calendar year
- YY: The last 2 digits of year
- ZZZ: Sequence numbers to indicate the position of the belt on the mold
- Example: 2221001 –> means the belt was manufactured in week 22 of year 2021
4. Store properly: there’s a number of ways each type of belt should be stored:
 Single V-belts: we recommend single V-belts be hung on the wall, using large diameter pegs made from PVC pipes, as its diameter is large enough to avoid “memory” in a single point of the belt.
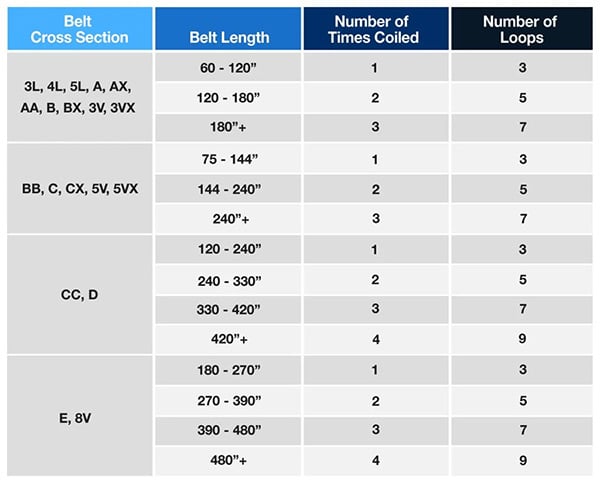
- Large V-belts: our team suggests “coiling” the belts to avoid excessive weight in a single point. The way to produce coils is to grab both extremes with the belt, one with the right hand, and the other with the left hand. At the same time, rotate the belt, one hand clockwise, and the other, counter-clockwise. Ensure to not over-coil your belts though. If a belt is coiled too many times, it puts undo stress on the cords inside the belt and can cause them to fray due to over-twisting.
- Banded V-belts: joined V-belt constructions, due to weight, should not be hung. They should be left inside a box lying flat on a shelf.
- Synchronous belts: also called timing belts and HTD belts, like Dayco’s HT Power, HT Power Plus and HT Power Carbon, these should be stored in original package and should avoid any manipulations. One very common practice is to remove these belts from their original package, tie them together really tight with a tie wrap and store them in drawers or bins to save space. When you do this, there is a great chance that you may compromise the internal cords of the belts by breaking them (crimping), leading to premature failure.

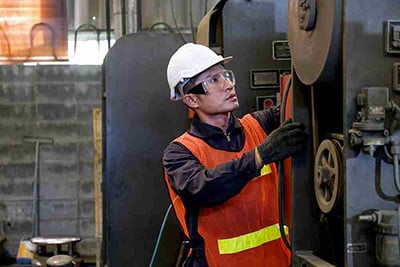 Belt drives are the most cost effective, reliable means of shaft-to-shaft power transmission speed change but they require regular inspection to ensure proper performance. Follow these steps for best practices on belt drive installation and inspection:
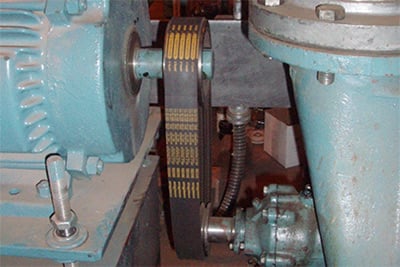 If you have a belt drive system that is under-performing or you’re looking for improved drive life, below are Dayco’s top tips on enhancing performance:
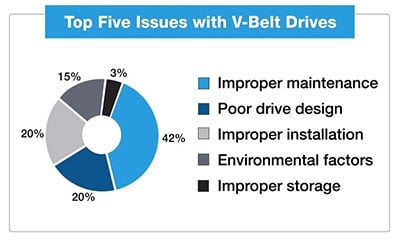 Many maintenance managers report V-belt drives only last two-three months but the reality is premium heavy-duty industrial V-belts are designed to run at least 22,000 hours, which equates to almost 2.5 years of continuous 24/7 operation. So why aren’t V-belts lasting as long as they should? Here’s five key reasons, according to recent data:
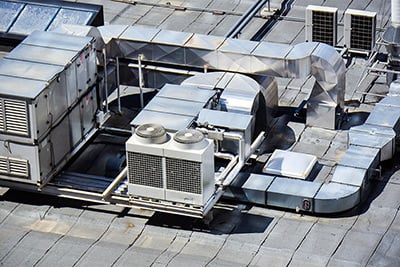 Belts used in HVAC applications are frequently found in exhaust and ventilation fans on rooftops. Often exposed to sunlight, humidity and extreme temperatures, these belts typically run in a very small sheave (usually variable pitch sheave on the motor) with a life that is extremely limited. Many repair technicians report replacement intervals occur 3 to 12 times per year using 4L and 5L V-belts. But these light-duty belts have low temperature resistance – usually up to 145oF – and high stretch.
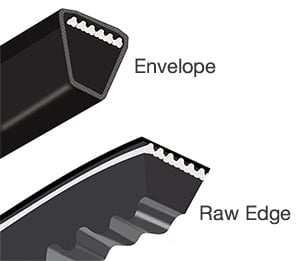 Dayco experts suggest switching from a 4L or 5L V-belt for some industrial/HVAC applications to a GOLD LABEL raw edge (notched) belt for increased performance and longevity. Here is how to cross reference these belts using the part numbers:
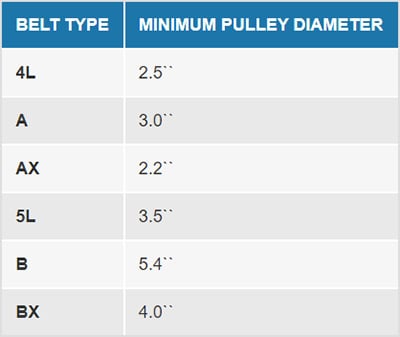 Our team does not recommend replacing a 4L belt with an A section wrapped belt due to the difference in the minimum pulley diameters (see chart). Going from 4L to an A section or from 5L to a B section is risky due to minimum pulley diameters. A BX can survive on a 3.5″ pulley and given the much higher capacity and temperature range, compensates for reduced life due to smaller than recommended pulley diameter condition.